
Updated for MacOS Ventura and Sonoma.
As of this writing, the latest version of wgrib2 is 3.1.3
.
There’s a new wgrib2 version for 2025 – version wgrib2 v3.7. View the install tutorial . This version is easier to install than past versions.
(The tutorial on this page is somewhat outdated and installs wgrib2 version 3.1.3. The newest wgrib2 version is wgrib2 v 3.7. Links to all four tutorials, including the latest install tutorial for wgrib2 3.7 are here.)
Originally Posted February 4, 2024
Updated 12-2-2024
Update: 12/2/24: I have figured out the issues with Sequoia. A new tutorial will be posted within 2 weeks.
This tutorial is an update. My previously posted tutorial applied to Intel and Apple Silicon Macs that had been migrated from a previous Intel directory structure.
Tutorial Revisions and Introductory Notes (optional)
Tutorial Start: Introduction to the wgrib2 utility
To work efficiently with very large weather GRIB2 data files, the wgrib2 utility was developed by a team of several NOAA data scientists, led by Wesley Ebisuzaki. It is an essential command line-based C and fortran-based program used to index and manipulate weather data grib2 files.
Most commonly, it’s used to extract and manipulate specific weather model parameters, perform calculations and to create GRIB2 files that cover smaller geographic areas.
Unlike most graphical interface applications a Mac user might use that are already compiled by the app’s developer, wgrib2 is a low level command line application that runs on the Mac’s underlying Unix -Darwin foundation. The Terminal program is used to run it.
Its operation is dependent on your Mac’s specific directory structure and the versions and locations of code libraries (“dependencies”) installed on your Mac. As a result, you must compile the wgrib2 program based on these dependencies and the specific directory structure of your Mac.
wgrib2 is supplied as as folder of code, scripts, and code libraries that are downloaded and then a compile script is run to put the program together.
This tutorial will explain how to do this.
From my original install/compile tutorial, installing wgrib2 on a Mac used to be a very complex and tedious adventure, fraught with problems, starts and stops. But it could be accomplished.
I’m happy to report that wgrib2 (latest version 3.1.3 ) can now be installed and compiled relatively easily on an Apple Silicon Mac.
A special thank you to a reader, “Davis Zhang“, who alerted me to me to the existence of a brief Japanese language install guide which showed that wgrib2 version 3.x can now be installed with a significant reduction in complexity on the latest versions of Mac OS.
As was the case my first install/compile tutorial and a more recent tutorial, this tutorial is designed for true novices with limited experience using Terminal and command lines. It’s probably more detailed than many people need, but I’m sure there are some of you that will appreciate the hand-holding.
Installing wgrib2 on Mac OS
Important- Use Bash shell in Terminal instead of .zsh
Apple now defaults to using zsh as its shell language. The feedback I’ve gotten from people using this tutorial is that zsh shell may not work. I highly recommend changing back to bash shell, at least for the installation/compilation of wgrib2.
Use your Terminal application to switch its shell default with the command—
chsh -s /bin/bash
Press return. You must Quit Terminal to have the setting saved.
Note for beginners: when copying and pasting commands, be certain there are no invisible or blank trailing spaces in the pasted command before hitting the return key.
Overview of the wgrib2 Install Steps
- Download wgrib2 from the NOAA web site; rename the folder
- Uncompress or ‘untar’ the wgrib2 download
- Download and install Apple Developer Tools
- Change or confirm you’re using bash instead of zsh for your shell
- Download Homebrew package installer needed to install required library “dependencies”. Create Homebrew recommended links and $PATH changes.
- Optional step to check your .bash_profile $PATH
- Using Homebrew, install various library dependencies – gcc, gfortran, cmake. Confirm proper directory structure and PATHs using ‘brew doctor‘ command. Check specific version of gcc installed.
- Edit the compilation script called ‘makefile‘
- Copy and paste a copy of your modified grib2 folder to the directory: /opt/homebrew/
- Run the ‘makefile‘ compilation script using a Terminal command to compile wgrib2 into an executable.
- Create a symlink of the installed wgrib2 in your /opt/homebrew/bin bindirectory so that it can easily be called using Terminal.
(Highlighted above means this is new for Sonoma and clean installs)
So here we go—
1- Download wgrib2 from the NOAA web site
The latest versions of wgrib2 code from NOAA and many README documents are available from this web site:
https://www.ftp.cpc.ncep.noaa.gov/wd51we/wgrib2/
As of this writing, the latest version is 3.1.3 (Download the version WITH libraries)
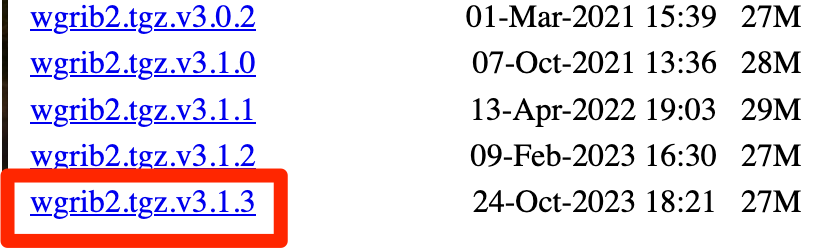
You’ll likely find the wgrib2.tgz.v3.1x package in your Downloads folder.
Move the wgrib2.tgz.v3 file from your Downloads folder to your Desktop
2-Uncompress the wgrib2.tgz download
On your Desktop, rename the wgrib2.tgz.v3.1.3 file to simply wgrib2.tgz by right clicking or option-clicking on the file and select rename. Confirm yes when it asks you to change the file type. This should be the filename—
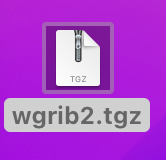
After renaming the file, double click on the wgrib2.tgz file. The file should untar (unzip, uncompress) and a folder called grib2 will be on your Desktop.

We’ll get back to this folder shortly.
3-Download and install Apple Developer Tools
You may have X-code already installed on your computer. If so, you will still need to install Apple Developer Tools.
Launch Terminal (in your Applications/Utilities Folder )
enter the following command and press return
xcode-select --install
After Developer Tools downloads and installs, it will launch. You MUST agree to the terms of the license agreement or things won’t go well.
Verify that you’ve successfully installed Xcode Command Line Tools using Terminal by entering this command and press return
$ xcode-select -p
You should see a confirmation showing where it’s installed
/Library/Developer/CommandLineTools
If you’re a novice, I strongly recommend that you quit Terminal after each major step and then restart the Terminal program. It avoids certain issues of being in the wrong directory, etc.
4- Download and Install HomeBrew
Homebrew is a “package installer” and is used to download and install certain dependency libraries of code, used by many utilities including wgrib2. We’ll be using Homebrew to install the dependent compiler packages such as gcc, gfortran and cmake.
Go to https://brew.sh/ and follow the relatively simple instructions to install HomeBrew by copying a command from its web site home page, then opening your Terminal program and pasting the copied command into the Terminal window.
•Copy the install command from the Homebrew web site.
•Paste it into the Terminal app window prompt.
Homebrew will install.

Important: Run the following command in Terminal after Homebrew finishes installing:
which brew
If Terminal responds— /opt/homebrew/bin/brew, continue with the tutorial immediately below.
If Terminal responds— /usr/local/bin/brew, then STOP AT THIS POINT and click on this link to continue—
Continue…. (if Homebrew is installed at /opt/homebrew/bin/brew—)
–> At the end of the install, HomeBrew will “recommend” two commands to create an important addition to your $PATH variable. This will allow it to run other commands.
Run these two commands below in Terminal to add Homebrew to your $PATH:
echo 'eval "$(/opt/homebrew/bin/brew shellenv)"' >> /Users/yourusernamehere/.bashrc
eval "$(/opt/homebrew/bin/brew shellenv)"
(HomeBrew will likely have shown the above two commands at the end of its installation, but they’re easy to miss. You can select and copy the command text at the end of the HomeBrew installation window and paste it back into the terminal window to run the recommended command for your specific computer.)
Now that HomeBrew is installed, enter the command below in Terminal and press return
brew doctor
This will check that everything is in its proper place. It will also do tests that may alert you to issues that may affect compilation and install of wgrib2. Running this command may result in recommendations of other commands to fix links, symlinks and conflicts. I do suggest that you follow its recommendations and fix the things it finds.
You can run “brew doctor” any time again to see other recommendations.
Using the Terminal File Menu, you can open a second window in Terminal to copy and paste HomeBrew’s recommendation commands to fix and solve any issues.
5-Using HomeBrew, install various library dependencies – gcc, gfortran, cmake
Now we’re going to install specific libraries that wgrib2 compilation will need.
Install gcc (installs gfortran automatically at the same time)
Open Terminal
Enter the command below in Terminal and press return
brew install gcc@13
gcc should then be installed.
Check to see where it’s installed, enter the following command in Terminal and press return—
which gcc
and terminal should show this, if gcc is installed:
/usr/bin/gcc
Installation of gcc includes automatic installation of gfortran.
To check to see where gfortran was installed, enter the following command in Terminal and press return—
which gfortran
and if it’s installed, Terminal will reply:
/opt/homebrew/bin/gfortran
Install cmake
Finally, we’ll use HomeBrew to install cmake.
Enter the command below in Terminal and press return—
brew install cmake
It should be installed and you can check success by using the “which cmake’ command.
Here’s an important point—
We need to know what version of gcc HomeBrew has just installed. The usual command to determine the gcc version will reveal that Apple has installed the ‘clang’ version when Developer Tools were installed.
Enter the following command in Terminal and press return—
gcc --version
You’ll see the following—
Apple clang version 14.0.0 (clang-1400.0.29.202)
Target: x86_64-apple-darwin21.6.0
Thread model: posix
InstalledDir: /Library/Developer/CommandLineTools/usr/bin
We don’t want to use this clang version when compiling wgrib2
So let’s find out the version that’s been installed by HomeBrew. It’s in the /opt/homebrew/bin/ folder.
Restart Terminal, then enter the following command and press return:
cd /opt/homebrew/bin/
then enter the command below and press return
ls
You’ll see the listing (ls) of what’s in the opt directory.
Terminal should report that gcc@13 is installed in this directory.

We can see that the version installed by HomeBrew in my /usr/local/opt directory is gcc-13.
(Don’t get confused by this: Terminal reports gcc@13, but the actual gcc file name is gcc-13. We will be using the actual file name gcc-13 for our edits)
IMPORTANT When we edit the makefile (covered below), the version you’re going to use is gcc-13, even though Terminal reports gcc@13.
(If you use the Go Menu in the Finder and use the command Go to Folder, and enter /opt/homebrew/bin/ you will see gcc-13, not gcc@13 is the name of the file. )
When we modify the the ‘makefile’ file script, be certain to use the version that was installed in your computer.
So to this point, we’ve installed Apple Developer Tools, gcc gfortran and cmake.
–> Now we’re going to return to the grib2 folder that’s on your Desktop that we had uncompressed (untarred) earlier.
6-Edit the wgrib2 installer “make” file.
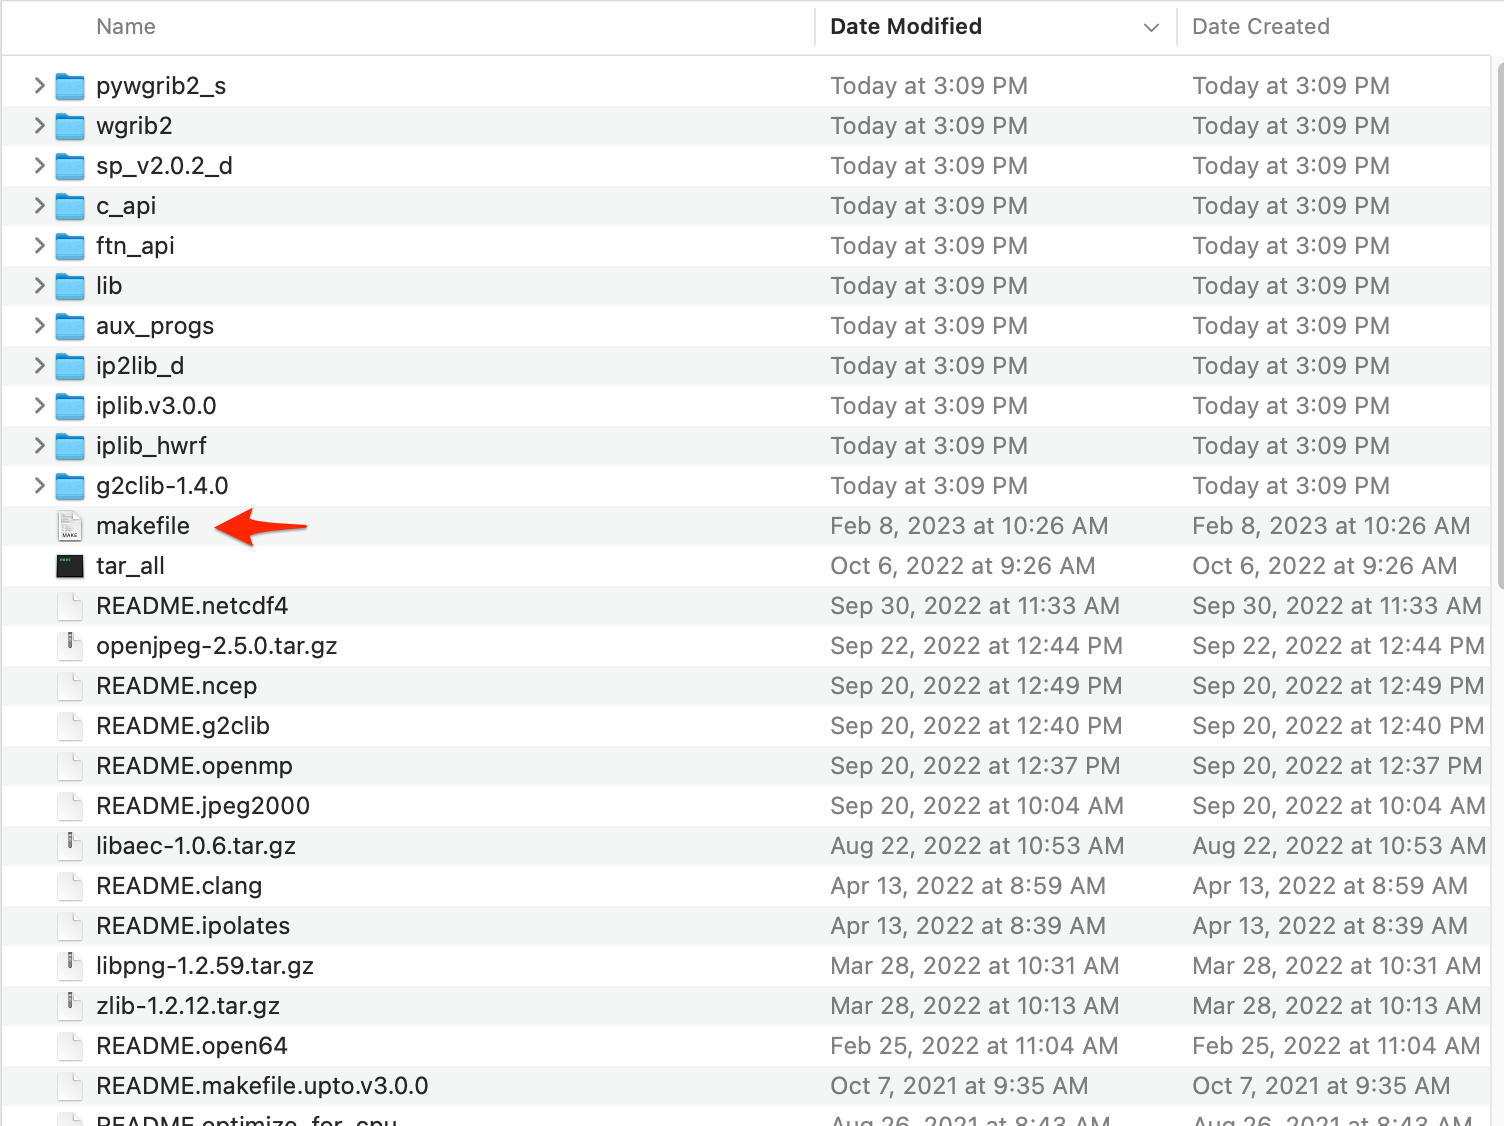
In the Finder, go to the folder grib2 downloaded and uncompressed earlier on your Desktop.
Open the grib2 folder on your Desktop. Inside you’ll see a file called ‘makefile‘.
We’re going to edit this the file using a text editor application.
Using any text editor, open the ‘makefile‘ file. Right click on the file and select “open with”. You can use TextEdit. I’ll be using BBedit to edit the makefile —
About line 154 or so (depends on the wgrib2 version) you will find under #Main development platform: linux with gcc/gfortran:
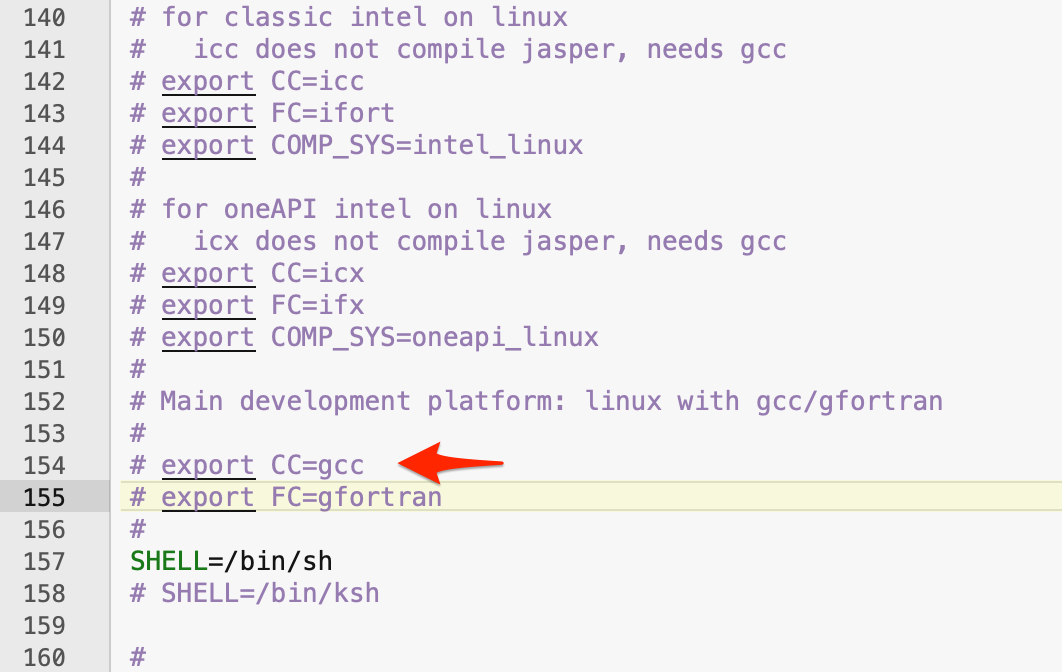
We are going to make the two lines referring to gcc and gfortran here active (by uncommenting) the lines (meaning, removing the preceding hashtag -#-) and editing to indicate the version of gcc that was installed with HomeBrew earlier.
Using your text editor, change these two lines:
# export CC=gcc
# export FC=gfortran
to this:
export CC=gcc-13
export FC=gfortran
Notice that the leading # has been removed from each line and the version number of gcc installed by Homebrew (gcc-13) has been edited in.
IMPORTANT When we modify the the ‘makefile’ file script, be certain to use the version that was installed in your computer.
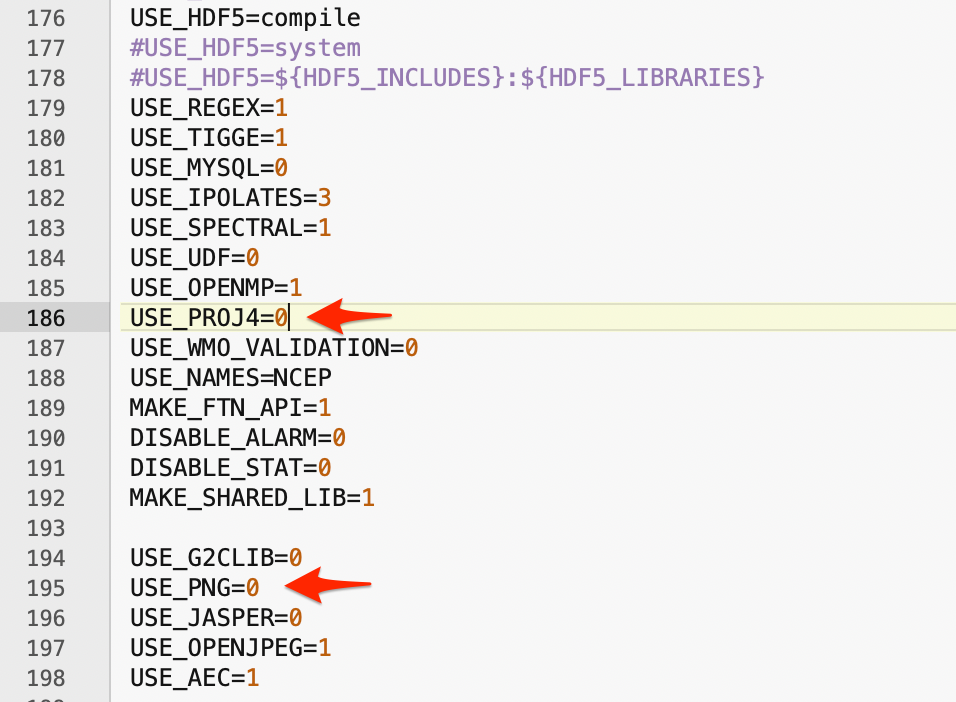
There are two more line changes that need to be made in this makefile–
• Change- USE_PROJ4=1 to USE_PROJ4=0
• Change- USE_PNG=1 to USE_PNG=0
–>When the edits have been completed, remember to SAVE the changes to the makefile from your text editor’s File menu.
Now close the grib2 folder on your Desktop.
7- Copy your grib2 folder and paste to /opt/homebrew
Using the Finder, select the grib2 folder on your Desktop and select the Copy command from the Edit Menu, or use the Command-c shortcut.
Using another command from the Finder, select the Go Menu and select Go to Folder…
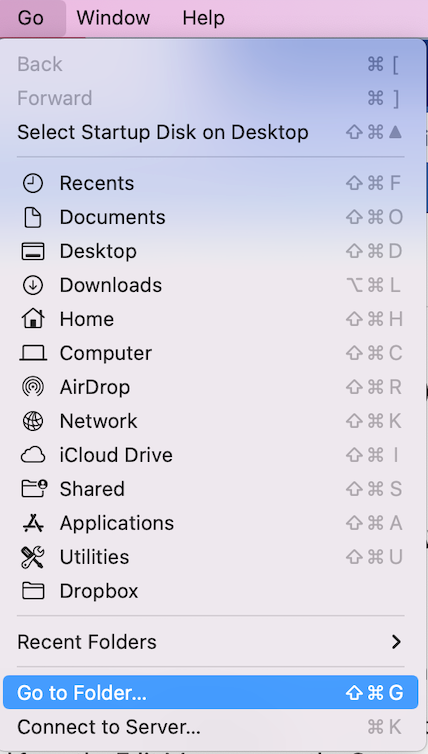
Enter this path:
/opt/homebrew/
This will show a normally hidden folder on your Mac, the
/opt/homebrew/ folder.
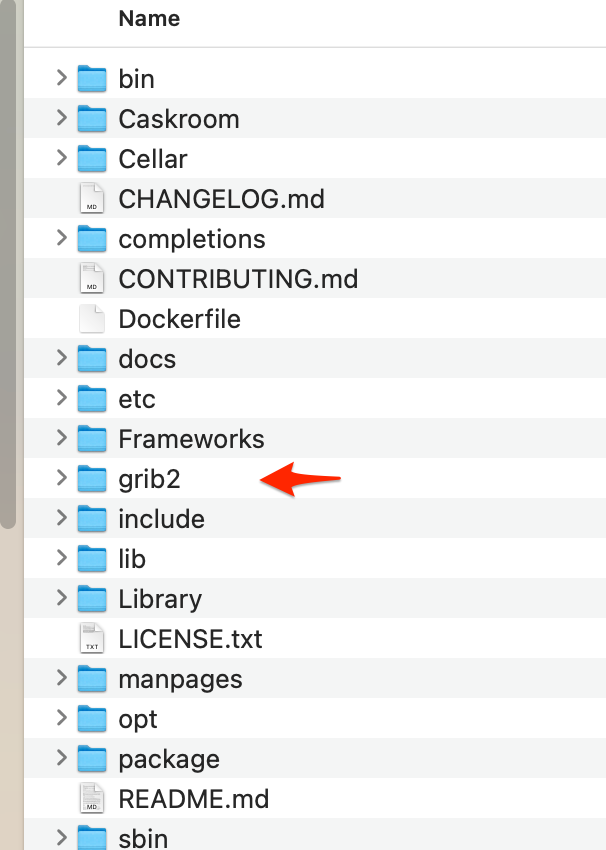
PASTE the grib2 folder (that you copied from Desktop) into this folder. (Command -v)
After pasting, you should see a copy of the grib2 folder in the
/opt/homebrew/ directory—
We’re almost there!
8- Run the ‘makefile’ compiler script in super user mode.
We’re ready to compile and install wgrib2.
Make sure you’re running as an administrator level user on your Mac.
Open Terminal.
Enter the following command and press return:
cd /opt/homebrew/grib2/
Then enter the following command and press return:
sudo make
You’ll be prompted for your user password. Enter it and press return.
You should see a bunch of gibberish scroll past on the Terminal window as it compiles and installs. It may take as much as 10 or more minutes for it to complete. Longer is usually a good sign.
When it completes, it should NOT have any error messages at the end. If it was successful, it won’t tell you. You just won’t see any errors at the end.
If you see error messages at the end, something is amiss. I’ll explore troubleshooting in another tutorial.
9- Create a Symlink
Quit Terminal. Restart Terminal again
We’re going to create a symlink in your /usr/local/bin folder so that Terminal can easily call wgrib2.
Enter the following command in Terminal and press return:
sudo ln -s /opt/homebrew/grib2/wgrib2/wgrib2 /opt/homebrew/bin
Enter your user password when prompted. Press return.
A symlink will have been created.
Now, let’s check if wgrib2 has been installed.
Quit and then reopen Terminal.
In Terminal, enter the following command in Terminal and press return—
which wgrib2
You should see the response
/opt/homebrew/bin/wgrib2
To see what wgrib2 can do, just enter this in Terminal and press return:
wgrib2
You should see all the commands wgrib2 can accept scroll in the Terminal window.
To see wgrib2 in action, use the terminal command on any .grib2 file you have to see its message contents—
wgrib2 -s mygribfile.grib2
Use of wgrib2 is an entire other tutorial.  Look for it in coming months.


Use the tips found here to use wgrib2— https://www.ftp.cpc.ncep.noaa.gov/wd51we/wgrib2/tricks.cheap

see the "tricks" links at

https://www.ftp.cpc.ncep.noaa.gov/wd51we/wgrib2/
Need Help with an Installation?
Use this Feedback form to email me.
Include your email address and the following information:
• Are you using Intel or Apple Silicon (M1 etc) ?
• What Mac system version are you using?
• Is this a new, clean install machine or was it migrated from another Mac?
• Had you previously installed HomeBrew for other software?
• Which directory is Homebrew installed in ? /usr/local or /opt
• Is there an existing /usr/local/ directory?
• Did you run the command brew doctor to make sure your symlinks are correct for homebrew? (You can run it several times to fix everything.)
• What version of gcc did you install?
• Did you make all the changes needed in the makefile compiler script —
Change- USE_PROJ4=1 to USE_PROJ4=0
Change- USE_PNG=1 to USE_PNG=0
Here’s a helpful article here about HomeBrew and Apple Silicon.
Here’s a helpful article about removing Homebrew to start clean.
Tip: If having compilation issues, remove any old symlinks for gcc and gfortran from your /usr/local/ and usr/local/bin/ directories.
#wgrib2 #install wgrib2 on MacOS
I am getting a ld: library ‘tiff’ not found alothough libtivv 4.6.0 is installed. any hints?
Thanks a lot for the tutorial!
I’m happy to help, but please use the link (above the comment form) to send me an email and include your email address.
I need a lot more info to help you
What Mac system version are you using?
What directory is Homebrew installed in ? /usr/local or /opt?
Is there an existing /usr/loca/ directory?
Did you run the command brew doctor to make sure your symlinks are correct for homebrew? You can run it several times to fix everything.
Did you make all the changes in the makefile compiler script especially
• Change- USE_PROJ4=1 to USE_PROJ4=0
• Change- USE_PNG=1 to USE_PNG=0
Glenn
What solved that problem? Getting the same error…
I’m getting the same error:
[ 69%] Building C object src/bin/jp2/CMakeFiles/opj_decompress.dir/__/common/color.c.o
[ 71%] Building C object src/bin/jp2/CMakeFiles/opj_decompress.dir/__/common/opj_getopt.c.o
[ 72%] Building C object src/bin/jp2/CMakeFiles/opj_decompress.dir/converttif.c.o
[ 73%] Building C object src/bin/jp2/CMakeFiles/opj_decompress.dir/convertpng.c.o
[ 75%] Linking C executable ../../../bin/opj_decompress
ld: library not found for -ltiff
collect2: error: ld returned 1 exit status
make[3]: *** [bin/opj_decompress] Error 1
make[2]: *** [src/bin/jp2/CMakeFiles/opj_decompress.dir/all] Error 2
make[1]: *** [all] Error 2
make: *** [/opt/homebrew/grib2/lib/libopenjp2.a] Error 2
There’s an email form if you want help. The comment area isn’t the place for such things.